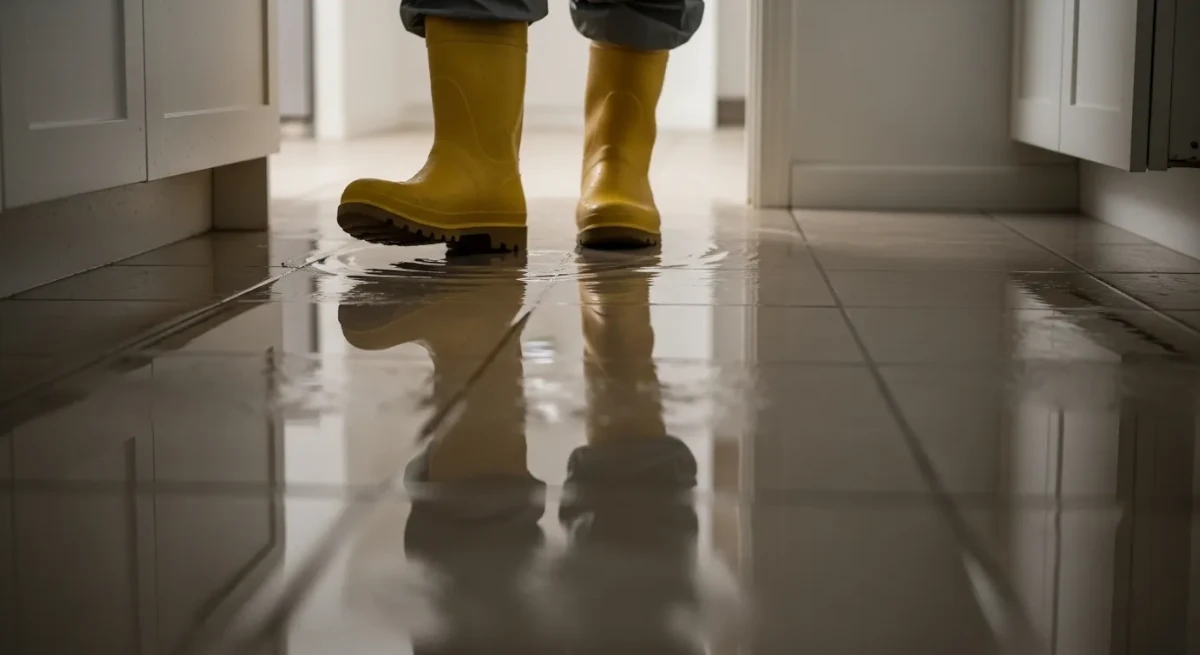
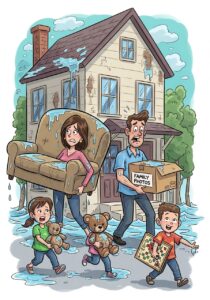
When your home floods, you don’t have the luxury of waiting. Every hour matters. Within 24-48 hours, mold can begin forming behind drywall, beneath flooring, and inside insulation, even if everything looks dry on the surface. If you’re staring at standing water or a ceiling stain that just broke open, you need answers FAST.
Give us a couple minutes of your time and we’ll walk you through the flood damage cleanup process step by step so you know exactly what to do first, what can safely be handled on your own, and where professional remediation becomes critical.
Protect Your Home Before Mold Takes Hold! Schedule Your Flood Inspection Today!
Flood Damage Cleanup Process: Step by Step:
The flood damage cleanup process step-by-step begins the moment water enters your home. Whether the source is a burst pipe, roof leak, appliance failure, or storm intrusion, every hour that moisture sits increases structural damage and the risk of mold growth. What may look like minor surface water can quickly spread into drywall, subfloors, insulation, and framing.
Understanding the correct order of action is critical. Below, we’ll walk through each step of flood damage repair, from safety checks and water stoppage to drying, sanitizing, and full restoration, so you know exactly what to do first and when professional help becomes essential.

Step 1: Safety Check Before Entering a Flooded Property
Flooded homes frequently contain hidden hazards that can cause severe injury or death if overlooked. Before stepping inside, pause and evaluate the situation carefully. Electrical systems, gas lines, structural components, and contaminated water can all present serious risks after flooding.
Safety Checks to Perform Before Entry:
- Confirm Electrical Safety: If the breaker panel, outlets, or wiring were exposed to water, assume the system may still be energized. Do not enter standing water unless power has been shut off at the main breaker or confirmed safe by a professional or utility provider.
- Keep Generator 20ft Away from Buildings: Carbon monoxide is toxic. It takes lives every day. Be sure not to run your generator inside the home.
- Check for Gas Leaks: If you smell sulfur (rotten egg odor) or hear a hissing sound, leave the area immediately. Call your gas provider or emergency services from outside the property.
- Inspect the Structure from the Outside: Look for sagging rooflines, leaning walls, foundation cracks, or collapsed areas that may indicate structural instability.
- Assess Water Levels and Flow: Moving water or deep standing water may conceal debris, sharp objects, or holes in flooring.
- Identify the Water Category if Possible:
- Category 1: Clean water from a supply line or rain intrusion.
- Category 2: Gray water from appliances, dishwashers, or sump failures.
- Category 3: Black water from sewage, stormwater runoff, or contaminated flooding.
Category 2 and Category 3 water can contain bacteria, chemicals, and other dangerous contaminants that pose significant health risks and often require professional remediation.
If any of the above conditions cannot be verified as safe, do not enter the building.
Step 2: Personal Protective Equipment (PPE) Required Before Entering a Flood Zone
Once you have confirmed the property can be approached safely, proper protective equipment is essential. Floodwater and moisture-damaged environments often contain bacteria, mold spores, sewage contaminants, sharp debris, and chemical hazards. Wearing the correct PPE helps prevent infections, respiratory exposure, skin contact with contaminants, and injury from hidden objects.
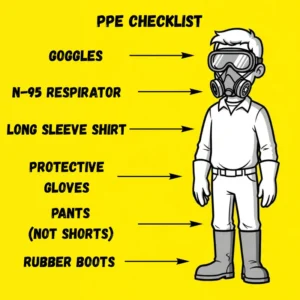
- Safety Goggles Or Sealed Eye Protection: Protect eyes from contaminated water, splashes, and airborne debris during inspection and cleanup.
- N95 Respirator (Or Higher-Level Respiratory Protection): Filters airborne mold spores, bacteria, and fine particulates commonly present in flood-damaged environments.
- Long-Sleeve Shirt: Provides a protective barrier to reduce direct skin contact with contaminated water and materials.
- Protective Gloves (Cut-Resistant Or Heavy-Duty Waterproof): Shield hands from bacteria, chemicals, sharp debris, and puncture hazards.
- Long Pants (No Shorts): Help prevent skin exposure to contaminated water, hidden debris, and irritants.
- Rubber Boots (Waterproof, Steel Toe Preferred): Protect feet from contaminated standing water, sharp objects, and unstable surfaces.
Proper PPE significantly reduces the risk of infection, respiratory irritation, chemical exposure, and physical injury when entering flood-damaged structures. Never enter floodwater areas without appropriate protection.
Safety Reminder: If conditions appear unsafe, structural damage is visible, or contaminated water is present, the safest decision is to wait for trained restoration professionals to assess the property.
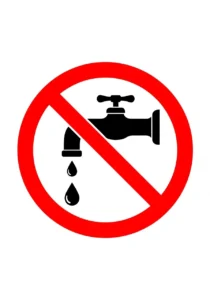
Step 3: Stop the Water Source
If water is still entering the home, you must stop it immediately.
For a broken pipe, shut off the main water valve. It’s typically located near the water meter, in a basement, crawl space, or utility room.
If the source is a roof leak, apply a heavy-duty tarp secured over the damaged area to prevent continued intrusion. This is a temporary measure until permanent repairs are made.
For appliance failures such as, washing machines, dishwashers, and water heaters, turn off the appliance and shut off its dedicated supply valve.
If basement flooding is caused by groundwater intrusion, redirect flow away from the structure using sandbags or temporary barriers and remove water as it enters. Long-term drainage corrections are handled separately, but immediate diversion reduces interior damage.
The faster you stop active water flow, the more materials you can save, and the lower your total restoration cost will be.
Step 4: Document Damage for Insurance
Before removing materials or discarding belongings, document everything.
Take wide-angle photos of each affected room. Then take close-up photos of damaged flooring, walls, furniture, appliances, and personal property. Record a full walk-through video narrating what you see.
Create a written inventory list of damaged items, including approximate age and value if known.
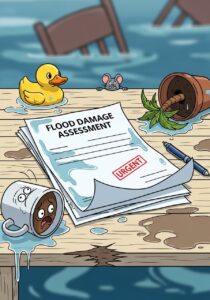
Do not throw away damaged materials until they’ve been documented. Insurers may request visual proof before approving claims.
Contact your insurance carrier immediately to report the loss and begin the claims process. Early reporting speeds up inspections and coverage decisions.
For more guidance, review:
Pro Tip: Open cabinet doors and closet spaces before photographing. Hidden swelling and damage behind closed doors is often missed, and under-documented claims are frequently underpaid.
Step 5: Remove Standing Water and Damaged Materials
Once the water source is stopped and the damage documented, immediate extraction must begin. For shallow, clean water, a wet/dry shop vacuum may be adequate. When water exceeds a few inches in depth, a portable sump pump is far more effective. In cases involving multiple rooms or contaminated water (Category 2 or 3), professional extraction is strongly recommended.
Truck-mounted systems can remove thousands of gallons quickly and pull moisture from beneath flooring. Speed is critical. Prolonged exposure allows water to saturate subfloors, framing, and insulation, significantly increasing structural damage and material loss.
After extraction, remove materials that cannot be properly dried or sanitized. Carpet padding almost always requires disposal because it traps moisture and contaminants. Drywall should generally be cut 12–24 inches above the visible water line, as moisture wicks upward inside wall cavities. Wet insulation must also be removed, since saturated fiberglass loses effectiveness and cellulose retains moisture. Baseboards should be detached to promote airflow. Controlled demolition may feel aggressive, but removing compromised porous materials prevents far more extensive repairs later.
Step 6: Dry, Clean, and Sanitize the Structure
Thorough drying is the most critical phase of mitigation. Surfaces may feel dry while moisture remains trapped inside walls, subfloors, and framing. Professional drying relies on high-velocity air movers to circulate airflow and commercial-grade dehumidifiers to continuously extract moisture from the air. Most importantly, moisture meters are used to verify internal drying progress, without measurement, you are only guessing. Structural drying typically takes three to five days, though severe or contaminated losses may require longer. Mold risk increases significantly within 24–48 hours if moisture remains trapped.

Once dry, all remaining structural surfaces must be properly cleaned and sanitized. This often includes antimicrobial treatments applied to framing and exposed materials, along with HEPA vacuuming to remove fine particulates after demolition. If odors persist, professional deodorization treatments neutralize contaminants rather than masking smells. In Category 3 losses involving sewage, sanitation protocols are more stringent and some materials may require complete replacement. Bleach alone is not sufficient for porous materials and can sometimes cause additional damage. Proper cleaning and sanitization create the safe foundation required for full restoration.

Step 7: Inspect for Mold Growth
Even after drying and cleaning, you’re not finished yet.
Pay attention to musty or earthy odors. Smell is often the first indicator that moisture remains trapped behind walls or beneath flooring.
Look for visible spotting or discoloration on drywall, trim, or ceilings. Warping, bubbling paint, or soft drywall can signal hidden moisture inside the wall cavity.
Don’t overlook your HVAC system. Flood events can contaminate ductwork, spreading particles and odor throughout the home if not properly inspected.
If you notice any of these warning signs, it’s time to bring in a professional mold remediation specialist. Early intervention prevents widespread contamination and larger reconstruction costs.
For detailed guidance, review:
Step 8: Restoration & Rebuild
Once mitigation is complete, restoration begins.
This phase may include:
- Drywall replacement
- New flooring installation
- Interior painting
- Cabinet repair or replacement

It’s important to understand the difference.
Mitigation stops and removes damage.
Reconstruction restores your home to its pre-loss condition.
A contractor who handles both phases ensures continuity, faster timelines, and fewer communication breakdowns. When done correctly, your home should not only look restored. It should be structurally sound and fully dry behind the walls.
How Much Does Flood Damage Cleanup Cost?
Flood damage cleanup costs vary depending on severity, water category, and affected materials.
Minor water mitigation can range from $3–$7 per square foot. More extensive losses involving Category 2 or Category 3 water can range from $7–$15+ per square foot, especially if demolition and sanitation are required.
If mold contamination develops, remediation adds additional cost due to containment, air filtration, and specialized cleaning.
Insurance coverage also varies. Sudden and accidental internal water damage is often covered. True external flooding typically requires separate flood insurance. Always verify your policy details before assuming coverage.
How Long Does Flood Cleanup Take?
Here’s a realistic timeline for most projects:
- Emergency Response: Within 24 hours
- Water Extraction: Same day or Day 1
- Structural Drying: Typically 3–5 days
- Demolition & Cleaning: During drying phase
- Reconstruction: 1–2 weeks depending on scope
- Extended Timeline: Longer if mold is discovered
Every situation is different, but rapid response significantly shortens total recovery time.
Flood Damage Cleanup Process: Final Thoughts
Flood damage spreads quickly, and even when surfaces appear dry, hidden moisture can continue damaging your structure and increasing the risk of mold. Fast action, proper safety precautions, and verified structural drying are the keys to preventing long-term problems and costly repairs.
If your home in Long Island or Brooklyn has experienced flooding, don’t wait for the damage to get worse.
Call Now For Expert Flood Cleanup And Inspection — We’re One Call Away.